Friday, April 19, 2013
Spiral Apple Dumplings
I'm always searching for recipes online. It's somewhat of an addiction as well as looking for ways to sneak in fruits and veggies so my kids would eat them. For this recipe I was on the "Better Homes and Gardens" website, typed in apples in the search box, and decided on making this one since I already had the all the ingredients on hand and lots and lots of apples which I'm trying get rid of before they become rotten.....So here's the link to the recipe enjoy!http://www.bhg.com/recipe/breads/spiral-apple-dumplings/
Tuesday, April 9, 2013
Weather Chart
The one in the photo above is my version of the chart.
This one I found on pinterest. It's the original version. I happened to come across this blog in which the blogger explains how the original creator of this weather chart has no blog of her own (not sure if she does now a year later), but go ahead over there and check it out. The blogger even has her own version. Mine isn't so professionally made as theirs are but I just really like the whole idea of it. The kids helped out too by coloring it using markers. Mine has 2 blank spaces since where I live we don't get any snow or much storms....just rain. So I didn't know what to put there and decided to leave them blank. Here's the link to that blog and a photo of her version of the weather chart: http://rowdyinroom300.blogspot.com/2012/07/weather-chart.html
Chocolate Banana Ice-Cream Loaf
Another recipe from my beloved book "Simply Delicious Desserts" which is based on recipes using Eagle Brand Sweetened Condensed Milk. This recipe was actually my first attempt in homemade ice-cream. It was a huge success with the kids!
Frozen Chocolate Banana Loaf
1 1/2 cups chocolate wafer cookie crumbs
1/4 cup sugar
3 tablespoons butter, melted
1 (14-ounce) can sweetened condensed milk
2/3 cup chocolate-flavored syrup
2 small ripe bananas, mashed (3/4 cups)
2 cups whipped cream
Line 9x5-inch loaf pan with aluminum foil, extending foil above sides of pan; butter foil. Combine Crumbs, sugar, and butter; press firmly on bottom and halfway up sides of prepared pan. In large bowl, combine sweetened condensed milk, chocolate syrup and bananas; mix well. Fold in whipped cream. Pour into prepared pan; cover. Freeze 6 hours or until firm. To serve, remove from pan; peel off foil. Garnish as desired. Slice to serve.
Color Words Wall Art
For the letters I used sparkly foam paper. And I simply wrote out my letters by hand on the back and cut them up and glued them onto a black poster. The girls really liked it! We hung it up in their room and read it a lot and even use it as a reference in writing sometimes.
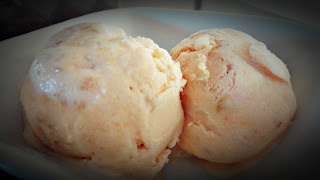
Homemade Ice-cream Without an Ice-cream Maker
Making ice-cream is so fun and easy. It tastes better since it's actually homemade and you can make any flavor you want. There are so many recipes out there to experiment with, but my recipe is actually from a book that my mom bought for .50 cents about 20 years ago and just recently I started to show some interest in this book. I'm sure glad that I did!
Homemade Ice-Cream Refrigerator-Freezer Method:
1 (14-ounce) can Sweetened Condensed Milk
1 cup pureed or mashed fresh fruit
2 cups (1 pint) whipped cream
1 tablespoon vanilla extract
Food coloring, optional
In a large bowl, combine sweetened condensed milk and vanilla; stir in pureed or mashed fruit and food coloring if desired. Fold in whipped cream. Pour into 9x5-inch loaf pan or other 2-quart container. Freeze 6 hours or until firm.
Homemade Pizza Dough
This is the first time I actually made a pizza! And for a beginner, I'll have to say that it turned pretty good! I'm so proud of myself! ;) The pictures above are all the same pizza. I only didn't didn't know which picture to choose since they're all at different angles. So I just uploaded all of them! :) The pizza dough recipe I used is from http://allrecipes.com/Recipe/Pizza-Dough-III/Detail.aspx . Here's a video they have on the website:
I'll be honest and say that I didn't do exactly like the video. For me, I thought the dough was too sticky and soggy looking. I was afraid to deal with that kind of dough, it looks like it's just too hard to control. So what I did was, I added in about 1/2 cup of flour in the first step and kneaded the dough until it was soft looking and formed it into a ball. Then I let it rise to double it's size. I punched it down to let the air out and rolled it out on my pan using my hands. I put on my favorite sauce and toppings, and there you go! Fresh homemade delicious pizza right from my oven!
One thing I want to mention is that I've made this only twice. The first time I used one recipe of the dough, and to me it was good but I just that it was a little on the thin side. So the second time around, I doubled up the pizza dough recipe and flattened it down on my pan and made my pizza, and realized that it was a little too thick especially around the edges. So I'm still working on how to make a perfect crust. Any suggestions?
Subscribe to:
Comments (Atom)


